Ice cube trays to feed a toddler? Genius. Just saying. Inspiration found here.
I thought mixing in new foods with some of Monkey's favorites would encourage trying. Not the case. She's too smart for that game. The foreign food was promptly disregarded and tossed to the floor. Oh well. I'm not having a food battle with her as there would be no winner only tantrums and more food to pick up off the floor.
Tuesday, July 3, 2012
Monday, July 2, 2012
Kombucha Adventure
About fifteen years ago my parents brewed and drank the 'Manchurian Mushoom" tea. As a kid I remember my Dad making their batch weekly. The 'mushroom' looked like a tan pancake and the brew smelled and tasted like vinegar. I didn't much care for it but they seemed to like it and took their shots daily. Well I guess the trend is still alive and well, now more popularly referred to as Kombucha.
And I bought one online.
You can learn/buy more about Kombucha here but essentially, it's a fermented tea that you make by leaving a culture of yeast and bacteria in sweet tea for about a week and let it do it's thing (technically it's not a mushroom). Yeah it sounds gross, putting a slimy bacteria-pancake in some tea and leaving it out on the counter for a week and then drinking it is probably unsettling to most. But I'll eat stuff off the floor and like science experiments. The bacteria also grows a new 'baby' after each brew, you can so kindly share with friends and family. The 'booch is supposed to aid in digestion and be cleansing and energizing. Maybe now that I'm an adult, my tastes have changed, as I I find it rather tasty. It's is slightly vinegary, mildly sweet and fizzy as the fermentation process naturally carbonates the tea.
So far I've been drinking it for about a week and a half. Honestly I haven't felt much of a difference in my general well being, but I have been using it as a replacement to my daily afternoon diet soda so that's probably an improvement to my health in general. I'll keep you posted on any revelations....
Stuff You Would Need to Brew Some 'Bootch" |
A Completed Batch. |
Friday, May 4, 2012
Tools Like Daddy
Thursday, May 3, 2012
Little Tikes Doll House Score
Monkey's birthday is coming up, she'll be two in a couple weeks. It sounds awful but I wasn't going to get her anything. She doesn't really get the present thing and she has grandmas and aunties that love to spoil her with toys and clothes. Not complaining, just saying kid's got a lot of stuff and she'll never know the difference. But. I found the coolest doll house on Craig's List. It's a Little Tikes Place doll house. Rolled off the assembly lines in 1989.
When I saw it I HAD to have it (you may have noticed, we already had the minivan and family (scored for $2 at Goodwill)). I don't know if I'd call my purchase a 'thrifty find' but I got the house, family of six (Mommy, Daddy, Boy, Girl and Twin Babies + Fido) and a bunch accessories for $75.
I really wanted it and the seller was firm on the price.
I love the generic (and retro) feel of the play set. Everything in the stores now a days is cheap, electronic or branded (Disney Princess, Dora the Explorer, (insert corporate trademark here), etc.) and I feel the play value is limited. Monkey can play with this for years. Not to mention, it's not gender specific so future children of mine can use it.
I couldn't wait and gave it to Monkey right after I brought it home. She loves it. Her favorite are the babies. She keeps putting them to bed and saying "ni-night". I told her the second Mommy and Daddy figures were Uncle John and Auntie. She keeps correcting me saying no it's "Monkey's uncle". Love it.
Front. |
Back. |
When I saw it I HAD to have it (you may have noticed, we already had the minivan and family (scored for $2 at Goodwill)). I don't know if I'd call my purchase a 'thrifty find' but I got the house, family of six (Mommy, Daddy, Boy, Girl and Twin Babies + Fido) and a bunch accessories for $75.
I really wanted it and the seller was firm on the price.
I love the generic (and retro) feel of the play set. Everything in the stores now a days is cheap, electronic or branded (Disney Princess, Dora the Explorer, (insert corporate trademark here), etc.) and I feel the play value is limited. Monkey can play with this for years. Not to mention, it's not gender specific so future children of mine can use it.
View from upstairs. |
Lol. The bathroom. |
From the front door. |
Uncle John and Auntie in the van. |
The Fam. |
Catzilla pays a visit. |
Wednesday, May 2, 2012
25 Minute Ironing Board Cover Tutorial
So, My ironing board is ugly and gross.
And I'm too cheap to buy one one. So on the final stretch of nap time Saturday, I whipped up a new one. It's quick and easy and I'm guessing most who may be reading this have enough crap in their stash to make one too.
Here's what'ch need:
Fabric, enough to cover the board and some extra (I scored mine at Goodwill)
String or ribbon. I tied together two shoe laces, cause that what I had (cheap remember?). You will need a length longer than the perimeter of your board (perimeter measurement + about 12")
The usual sewing gear:
Cutting mat
Rotary blade
Scissors
Tape measure
Pins
Ironing Board (duh)
Iron
First:
Lay your fabric face down and place the ironing board on top like this;
Trace and cut around the board about 1/2" out from the edge to account for the seam allowance.
Next, with the remaining fabric cut 3" wide strips. You will need one piece long enough to go around the perimeter of the top piece you just cut. Use your measuring tape to find out how long your final strip needs to be. I had to piece together my scraps to make it. If you're a little short, no worries (it's an ironing board cover, it doesn't have to be perfect and no one's judging).
After you have your strip cut and pieced, fold, press and sew each end like this (just so the raw edges are contained and it looks finished):
Next, fold the strip in half (hotdog style) and press.
Insert your ribbon, string, shoes laces, dental floss, or what ever you're, into the fold like this:
Pin the folded strip to the top piece, fabric fancy side up and raw edges lined up.
Find the middle of your strip start by pinning to the 'top' of the ironing board, the ends should meet at the middle of the 'bottom'. Make sure the ends of the strings are hanging out.
Machine sew all the way around with what ever seam allowance you like, I used 1/4". Be careful not to sew into your string.
That's it. Flip the lip down, put it on your board and pull the string tight.
Done.
Sunday, March 11, 2012
Saturday, March 10, 2012
Walmart Square Quilt
I finished my first quilt this week end! I think I started on it back in August and it's been sitting in my 'to finish' pile for a while. It's a simple square design that I made using fat quarters and sale fabric from Walmart, yeah it's a Walmart quilt. The binding is fabric from my stash that once was my Grandmothers.
I really love the look of free motion quilting, but I must say that was the main point of frustration getting this thing done and in retrospect, I probably should have used a simpler quilting method for my first time. I had a lot of trouble adjusting the tension on my machine to get a result that didn't totally suck. And even then, there are some parts on the back where the thread is bunched up and I am not really happy with the result. I also rushed while binding it (I was really excited that it was almost done) and it looks sloppy. But done is better than perfect right?
Here is is:
It's small, but a perfect for the couch, beach or a picnic.
Sounds awful, but I indented this to be a gift for someone while making it but I'm totally keeping it. Partly because I'm not too happy with my craftsmanship on some parts but mostly because after all the frustration tackling the quilting I really don't want to part with it.
Have a great weekend.
~Nancy
Wednesday, February 22, 2012
This House is Clean
You know that scene in Poltergeist were the mom looks away for a moment and when she looks back the kitchen chairs are stacked on the table?
Yeah, that totally happened to me while vacuuming tonight.
She hasn't honed her skills yet, but the timeliness of the execution was impressive.
Tuesday, February 14, 2012
Happy Valentines Day!
I'm not festive for holidays, but this year I went all out and made some heart shaped cookies for Monkey and the guys at work. I've definitely been on a baking streak lately as I usually NEVER bake anything, but I did make this last week and am scheming to make a SAUERKRAUT cake in the near future (stay tuned I'll share all the gory details).
Obviously, I'm not a baker:
This is how I roll (dough). |
I used a simple sugar cookie recipe and got about two and a half dozen (We ate a bit of the dough along the way).
Monkey really seems to like them!
Yeah it's February and she's wearing Halloween jammies, so what.
Elmo is having some milk too. |
Hope your day was awesome.
Saturday, February 4, 2012
Pocketed Valentine Cards
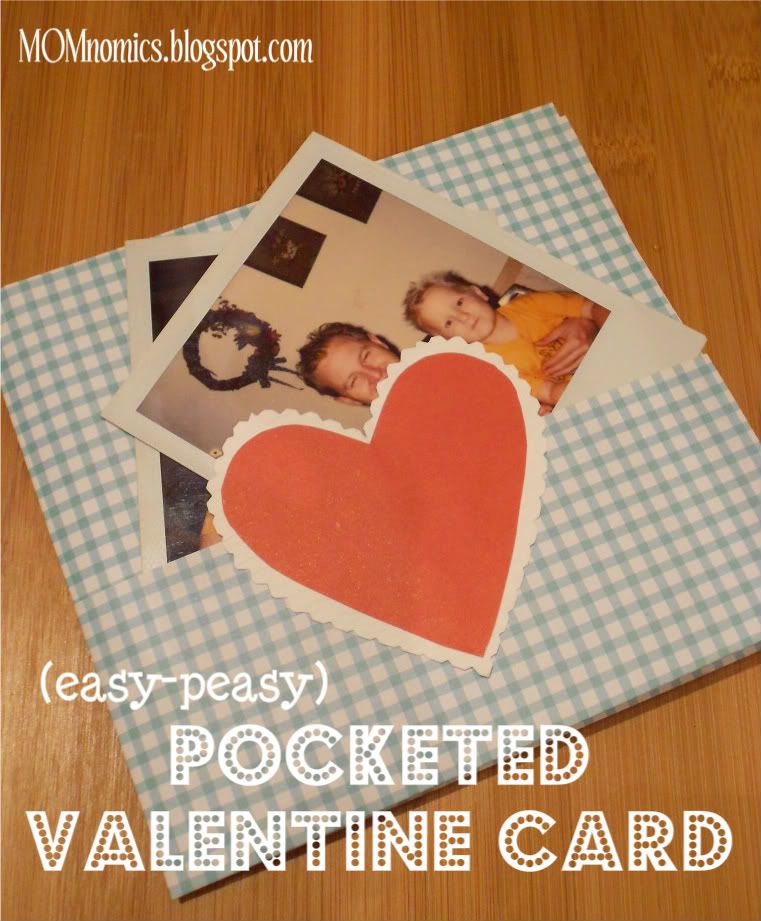
Are you ready for Valentines day? Monkey's still a little young to get it, but I love making cards for Grammas, Aunties and Friends from the two of us.
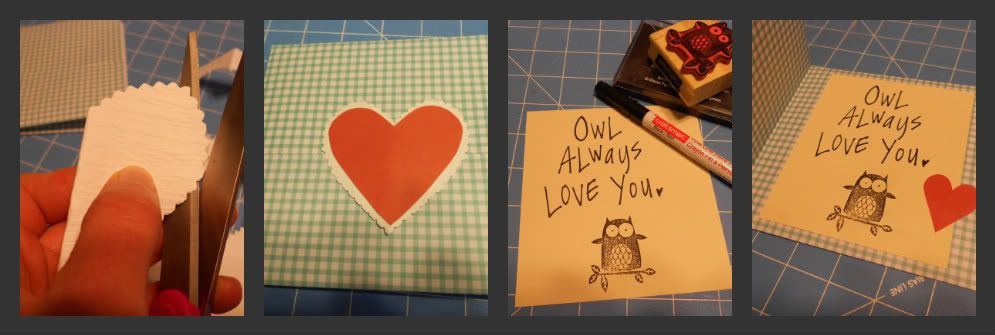
This is a really easy card to make and the possibilities are endless when decorating.
I kept mine simple because I'm lazy short on time this weekend and want to bust a few out to send to family members in time for Valentines day.
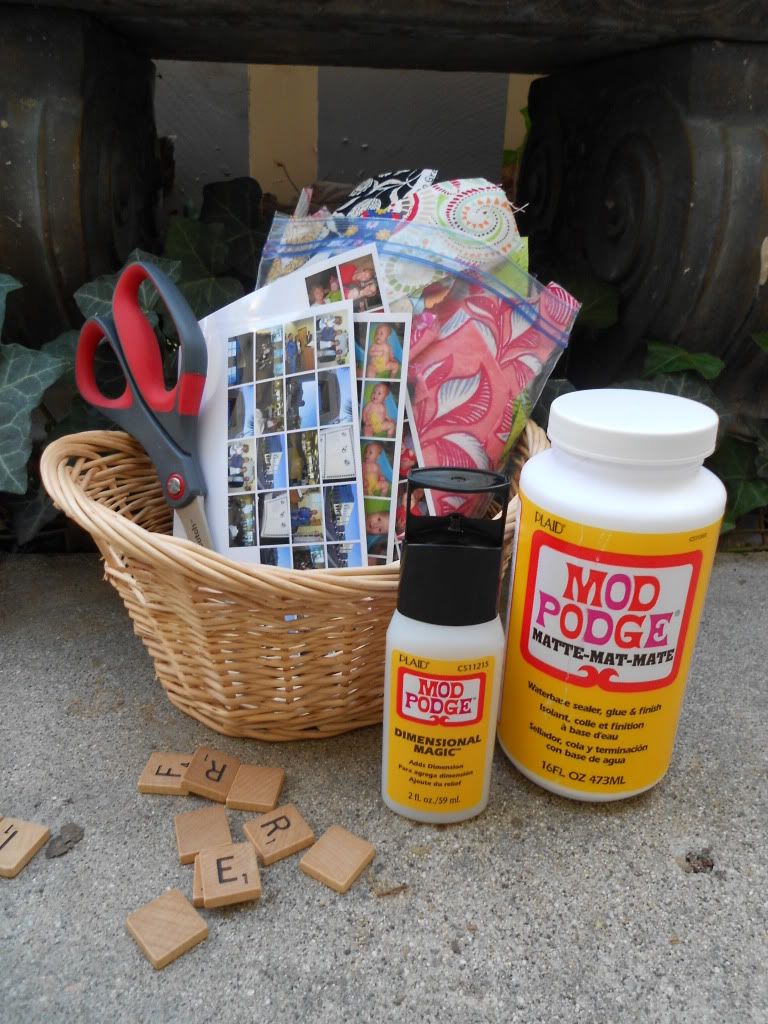
Here's what you'll need:
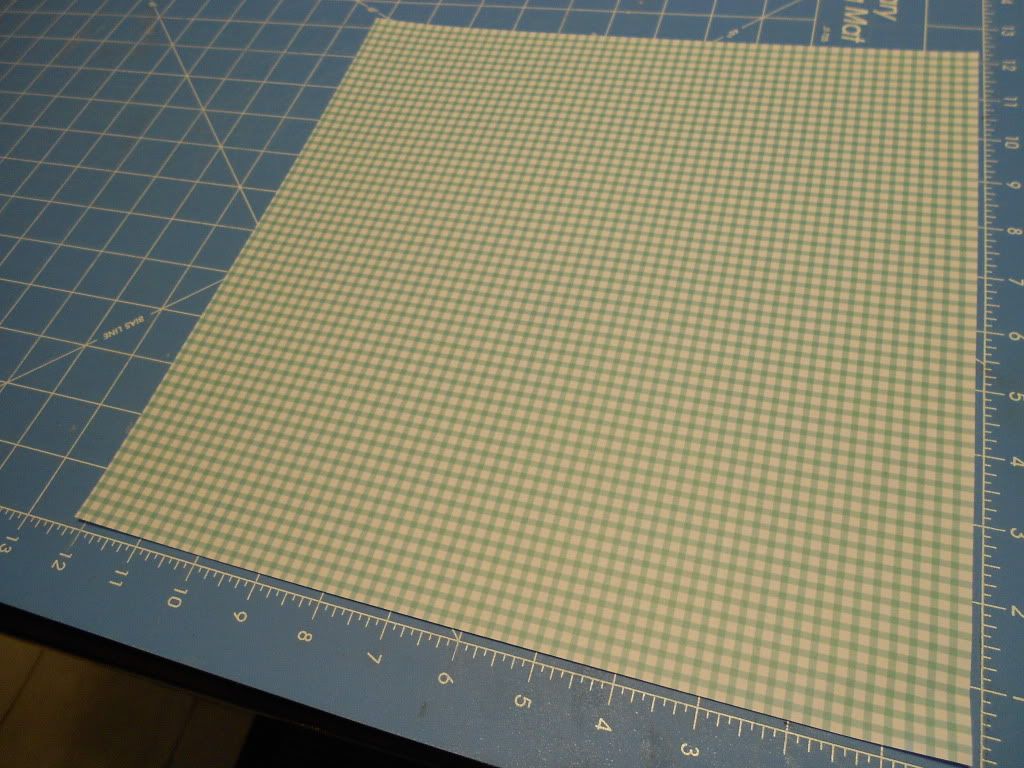
12x12 Scrapbook paper
Cutting Mat or Ruler.
Glue Tape
Anything else you want to decorate, go crazy.
Lightweight stuff to put in the pockets.
To make the Card:
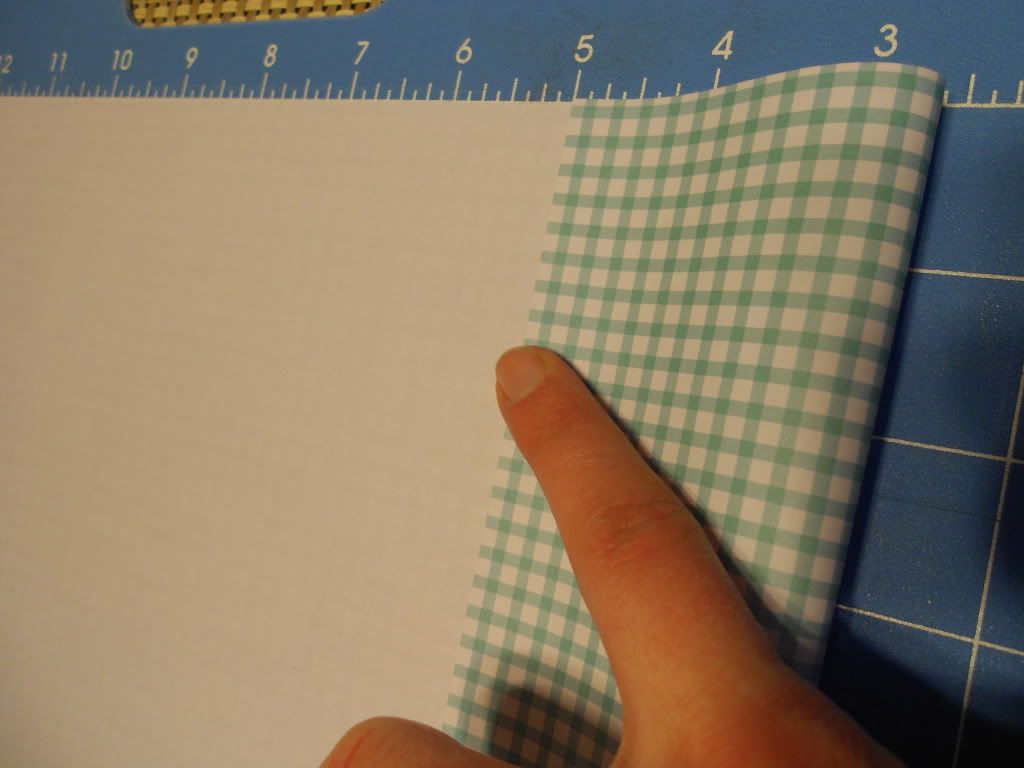
Put the paper on your cutting mat in the '0' corner
Line up the sheet so the all edges are flush with the grid
(Technically, you want your paper to be face down)
Fold up one edge to the 5" mark
Crease
Move the folded edge back to the '0' mark
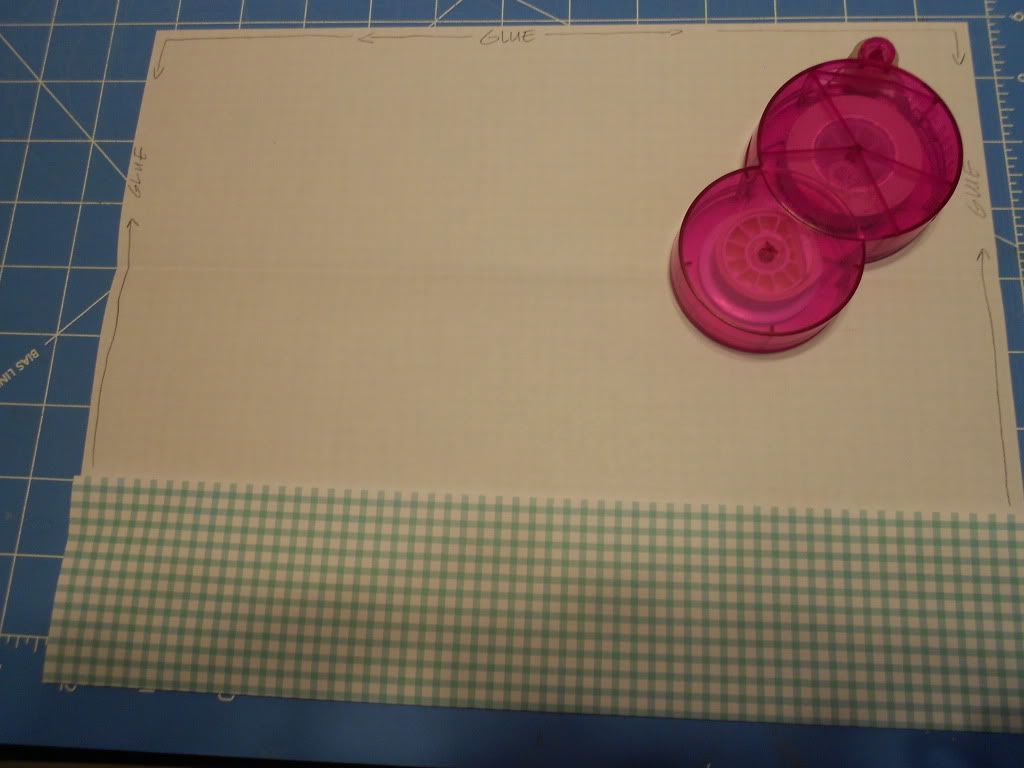
Fold down the top of the paper to the 2 1/2" mark and crease
Unfold this for the next step
Using glue tape (a glue stick would work just fine),
glue the edges around the top of the paper as indicated.
Glue the sides of the bottom fold.
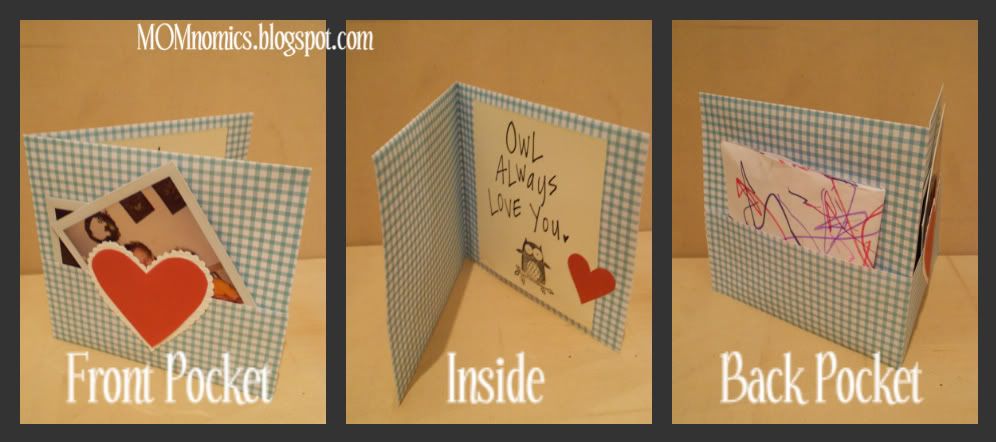
This is your pocket.
There will be a slight over lap of the pocket with the top of the card
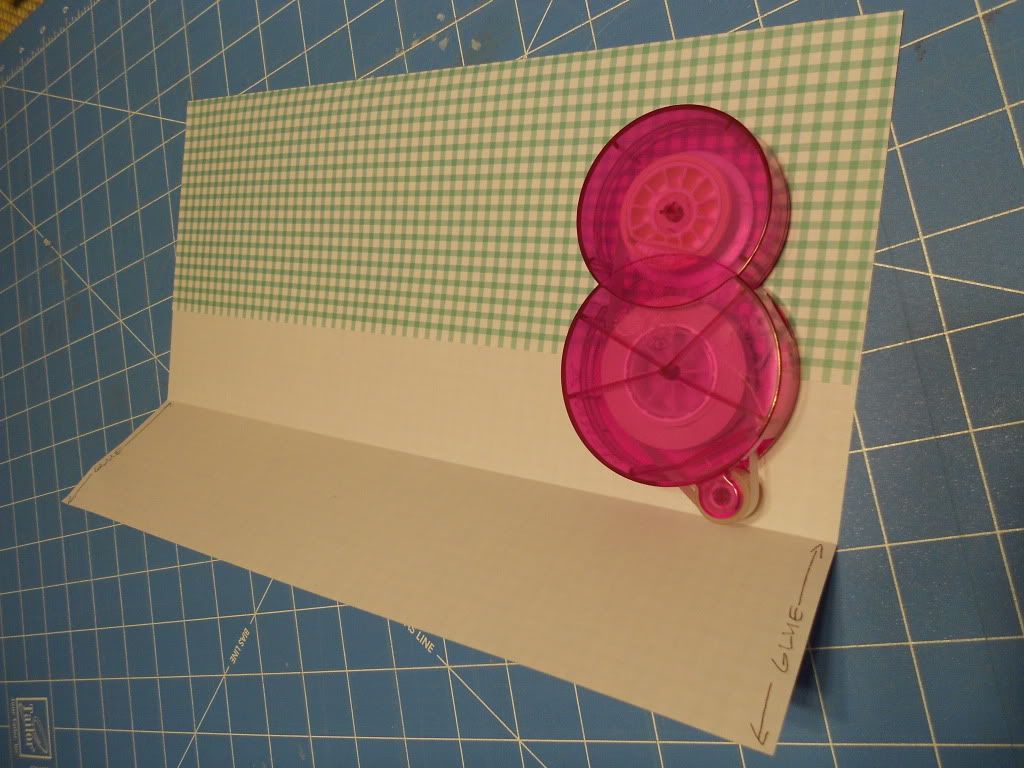
Fold in half.
I wanted my pocket on the outside of the card.
You can totally fold it the other way if you want yours in the inside
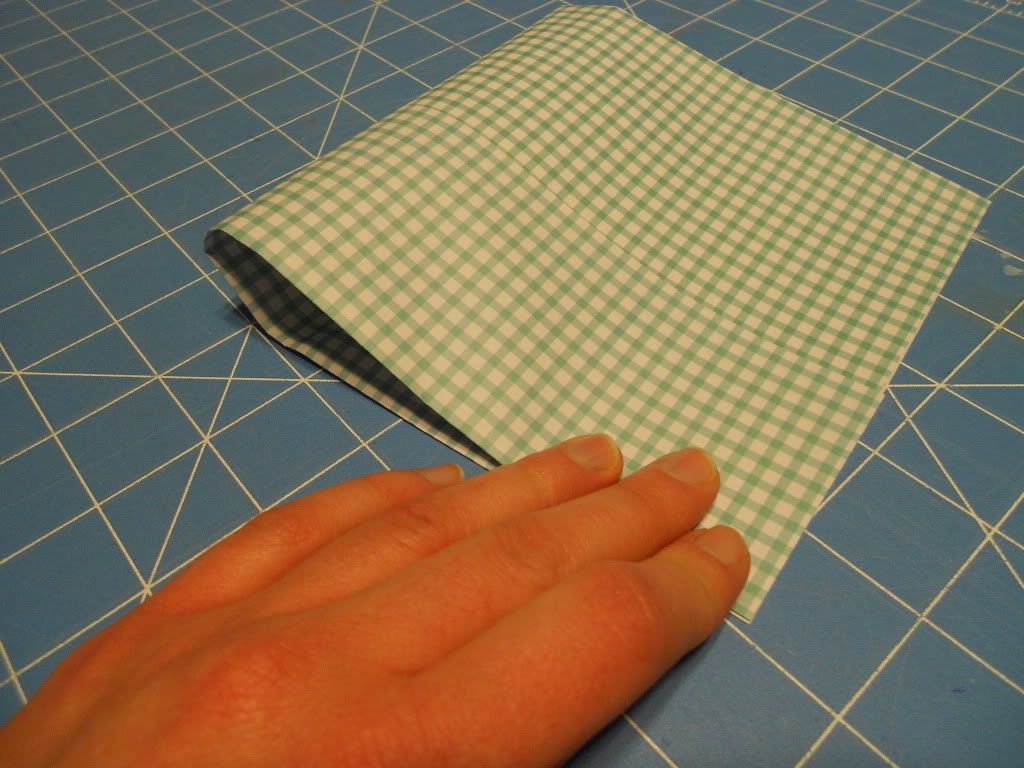
That's it!
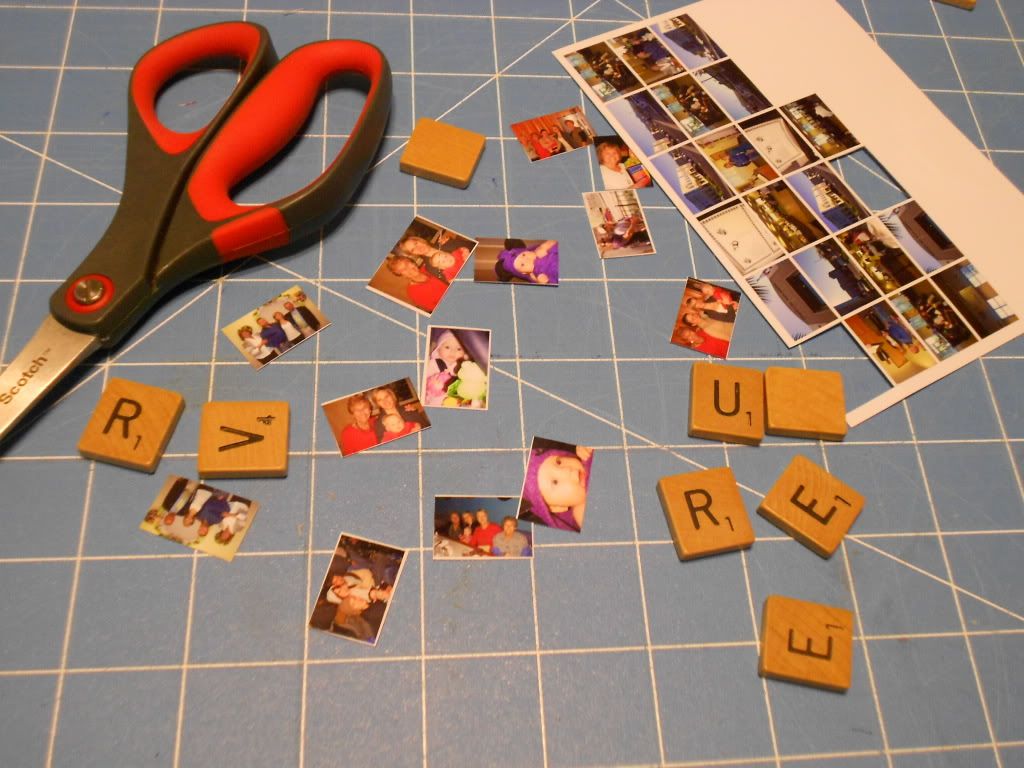
Decorate to your liking.
(Don't forget your cheesy Valentine saying. The cornier the better in my opinion)
You can put anything you want in the pockets,
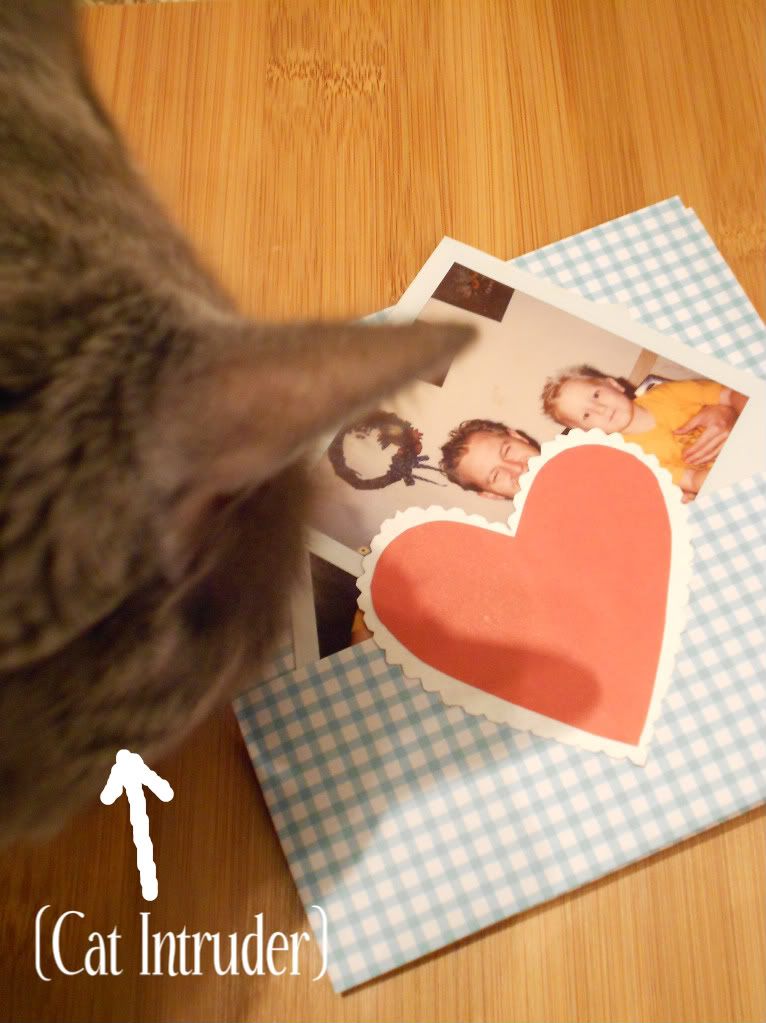
I plan to mail mine so I'm throwing in just a picture
(If you plan on putting anything in heavier than a few pictures or a note, I recommend using card stock)
I slipped some of Monkey's art work in the back pocket for fun.
Now, the hardest part for me, getting these in the mail this week.
I still have valentines from last year that never got sent :-/
Happy Crafting! Hope you have a great weekend.
Sunday, January 29, 2012
Black Bears, Beets, Battlestar Galactica.
So I'm not big on baking. We don't keep a lot of sweets in our house, but most of all, I hate following directions and recipes. You really can't get away cutting corners when baking a cake. But I do love sneaking vegetables into food. Especially if they are unnoticed and unexpected. So when I ran into Joy the Baker's recipe for Chocolate Beet Cake with Beet Cream Cheese Frosting (link to recipe, if you didn't notice ;-)) on Pinterest I knew I had to try it. Luckily, Monkey had a playdate this weekend and I asked to bring dessert so I had an excuse to make this. So I bought me some beets, some baking gear and some flour, sugar and other baking necessities. And I had my beet baking adventure.
I followed the recipe almost to a tee (which is difficult for me) and it turned out great (meaning nothing burned and the caked looked like something people would consent to eating).
OK, I DID stray from the directions slightly, I used my food processor to grate the beets in an attempt to avoid the purple fingers. But this was futile as it seems that any contact with a roasted beet, even minimal, stains. Oh well.
Also do not own a stand mixer (which is used in the recipe) and was forced to use my $5 hand mixer. He did the job fine, but I'm pretty sure I will find some rouge pink frosting that was flung around on the next kitchen cleaning.
Isn't my cake cute? I love me a double layer cake.
I don't own any fancy cake stands so it's frosted on a pain ol' plate. I strategically placed some strips of parchment paper under the edges, frosted that bad boy and slipped out the paper when I was done.
Neatly frosted on the bottom.
I am so proud of myself.
Anyways, aside from being a lovely purplish color the cake was fantastic and really moist. Not too chocolatey and no beetyness. The cream cheese frosting was equally as good and gets it's pink color from, you guessed it, beets. I was a little worried of potential beetyness in the frosting, since unlike the beets in the cake (baked in the oven after roastage), the beets used are straight roasted beets. But to my amazement, no beet favor at all. Delish.
The only down side to the recipe,
A TON of left over beet frosting. Enough to top some black bean brownies perhaps?
Saturday, January 28, 2012
Scrabble Tile Charms
But you know what? There are a ton of super awesome projects
with scrabble tiles. Here’s my take on Scrabble tile charms. Ready? Let’s do it.
Here’s what you’ll
need:
Scrabble Tiles, obviously
Modge Podge
Modge Podge Dimentional Magic
*Found with
the Modge Podge in the craft Store
‘thumbnail’ sheet
from picture prints
(that sheet of paper you get when you get prints, has a
preview of all the pictures)
Other Ideas…..
Scrap fabric
Scrap book paper
Rhinestones, glitter, whatever
Magnets
Wire
Clever husband to
drill holes through your tiles
Cut to size.
Use the Modge Podge to glue the picture to the smooth side
of the tile.
Paint a thin layer over the picture too.
Allow to dry
(At least until it’s no longer tacky to the touch)
Whip out the Dimensional Magic.
Carefully put a coating over the picture.
*Be sure to squeeze a little out on a scrap piece of paper
first.
Bubbles suck and they are a pain to get rid of.
When you’re done, put the tiles somewhere out of reach of
curious cats, husbands and toddlers,
and allow to dry
completely
(Instructions on bottle recommend 3 hours, I’m paranoid and
left mine overnight)
That’s it! You can do whatever you want with your tiles, I
made magnets and pendants for jewelry.
I recommend that you glue the magnets or drill your holes
before you start the Modge Podgeing.
Also, if you’re making pendants for jewelry, put your
hardware through the hole beforehand or risk sealing the hole.
Pretty neat huh? I really like the look the Dimensional
Magic gave the charms.
A great gift for a
Scrabbleholic Mom, no?
Subscribe to:
Posts (Atom)